PROPATCH

in five minutes

What ProPatch is, how to power it up and connect it, and how to describe a studio so any Device can be routed to any other with a click.

Use ← → or Space to move between slides.

The idea

A patchbay that patches itself.

ProPatch replaces patch cords with relays. Describe what's plugged in once, in the ProPatch app. After that, route by name, like Mic 1 → Neve → 1176 → Apollo, and ProPatch makes the connection.

A normal patchbay

Every jack has to be remembered. Every patch is made by hand and remade each session. The routing lives in someone's head or on a sheet of paper.

ProPatch

Everything is labeled in software. Signal paths are built by dragging named Devices together, then saved, and a whole studio setup comes back in an instant.

It's a straight wire.A relay connection adds no gain, conversion, or processing. The signal isn't changed.
It carries anything.Mic, line, and instrument level, 48 V phantom, AES/EBU, and control voltages.
It doesn't mix.One output can feed several places, but two sources can't be summed into one.
The pieces

One box, two pieces of software.

1

The ProPatch unit

The rack unit. Devices plug into it, and its relays make the connections.

2

Wolffhound

The desktop app to open first. It works like a web browser: it finds every Wolff Audio unit on the network and opens each one in its own tab.

3

The ProPatch app

What opens when a ProPatch tab is clicked. Devices are set up and routes are built here.

No hardware yet? Wolffhound includes a Demo Device tab: a practice ProPatch with nothing behind it.

☰↻
128Studio A
64Studio B
128Demo Device
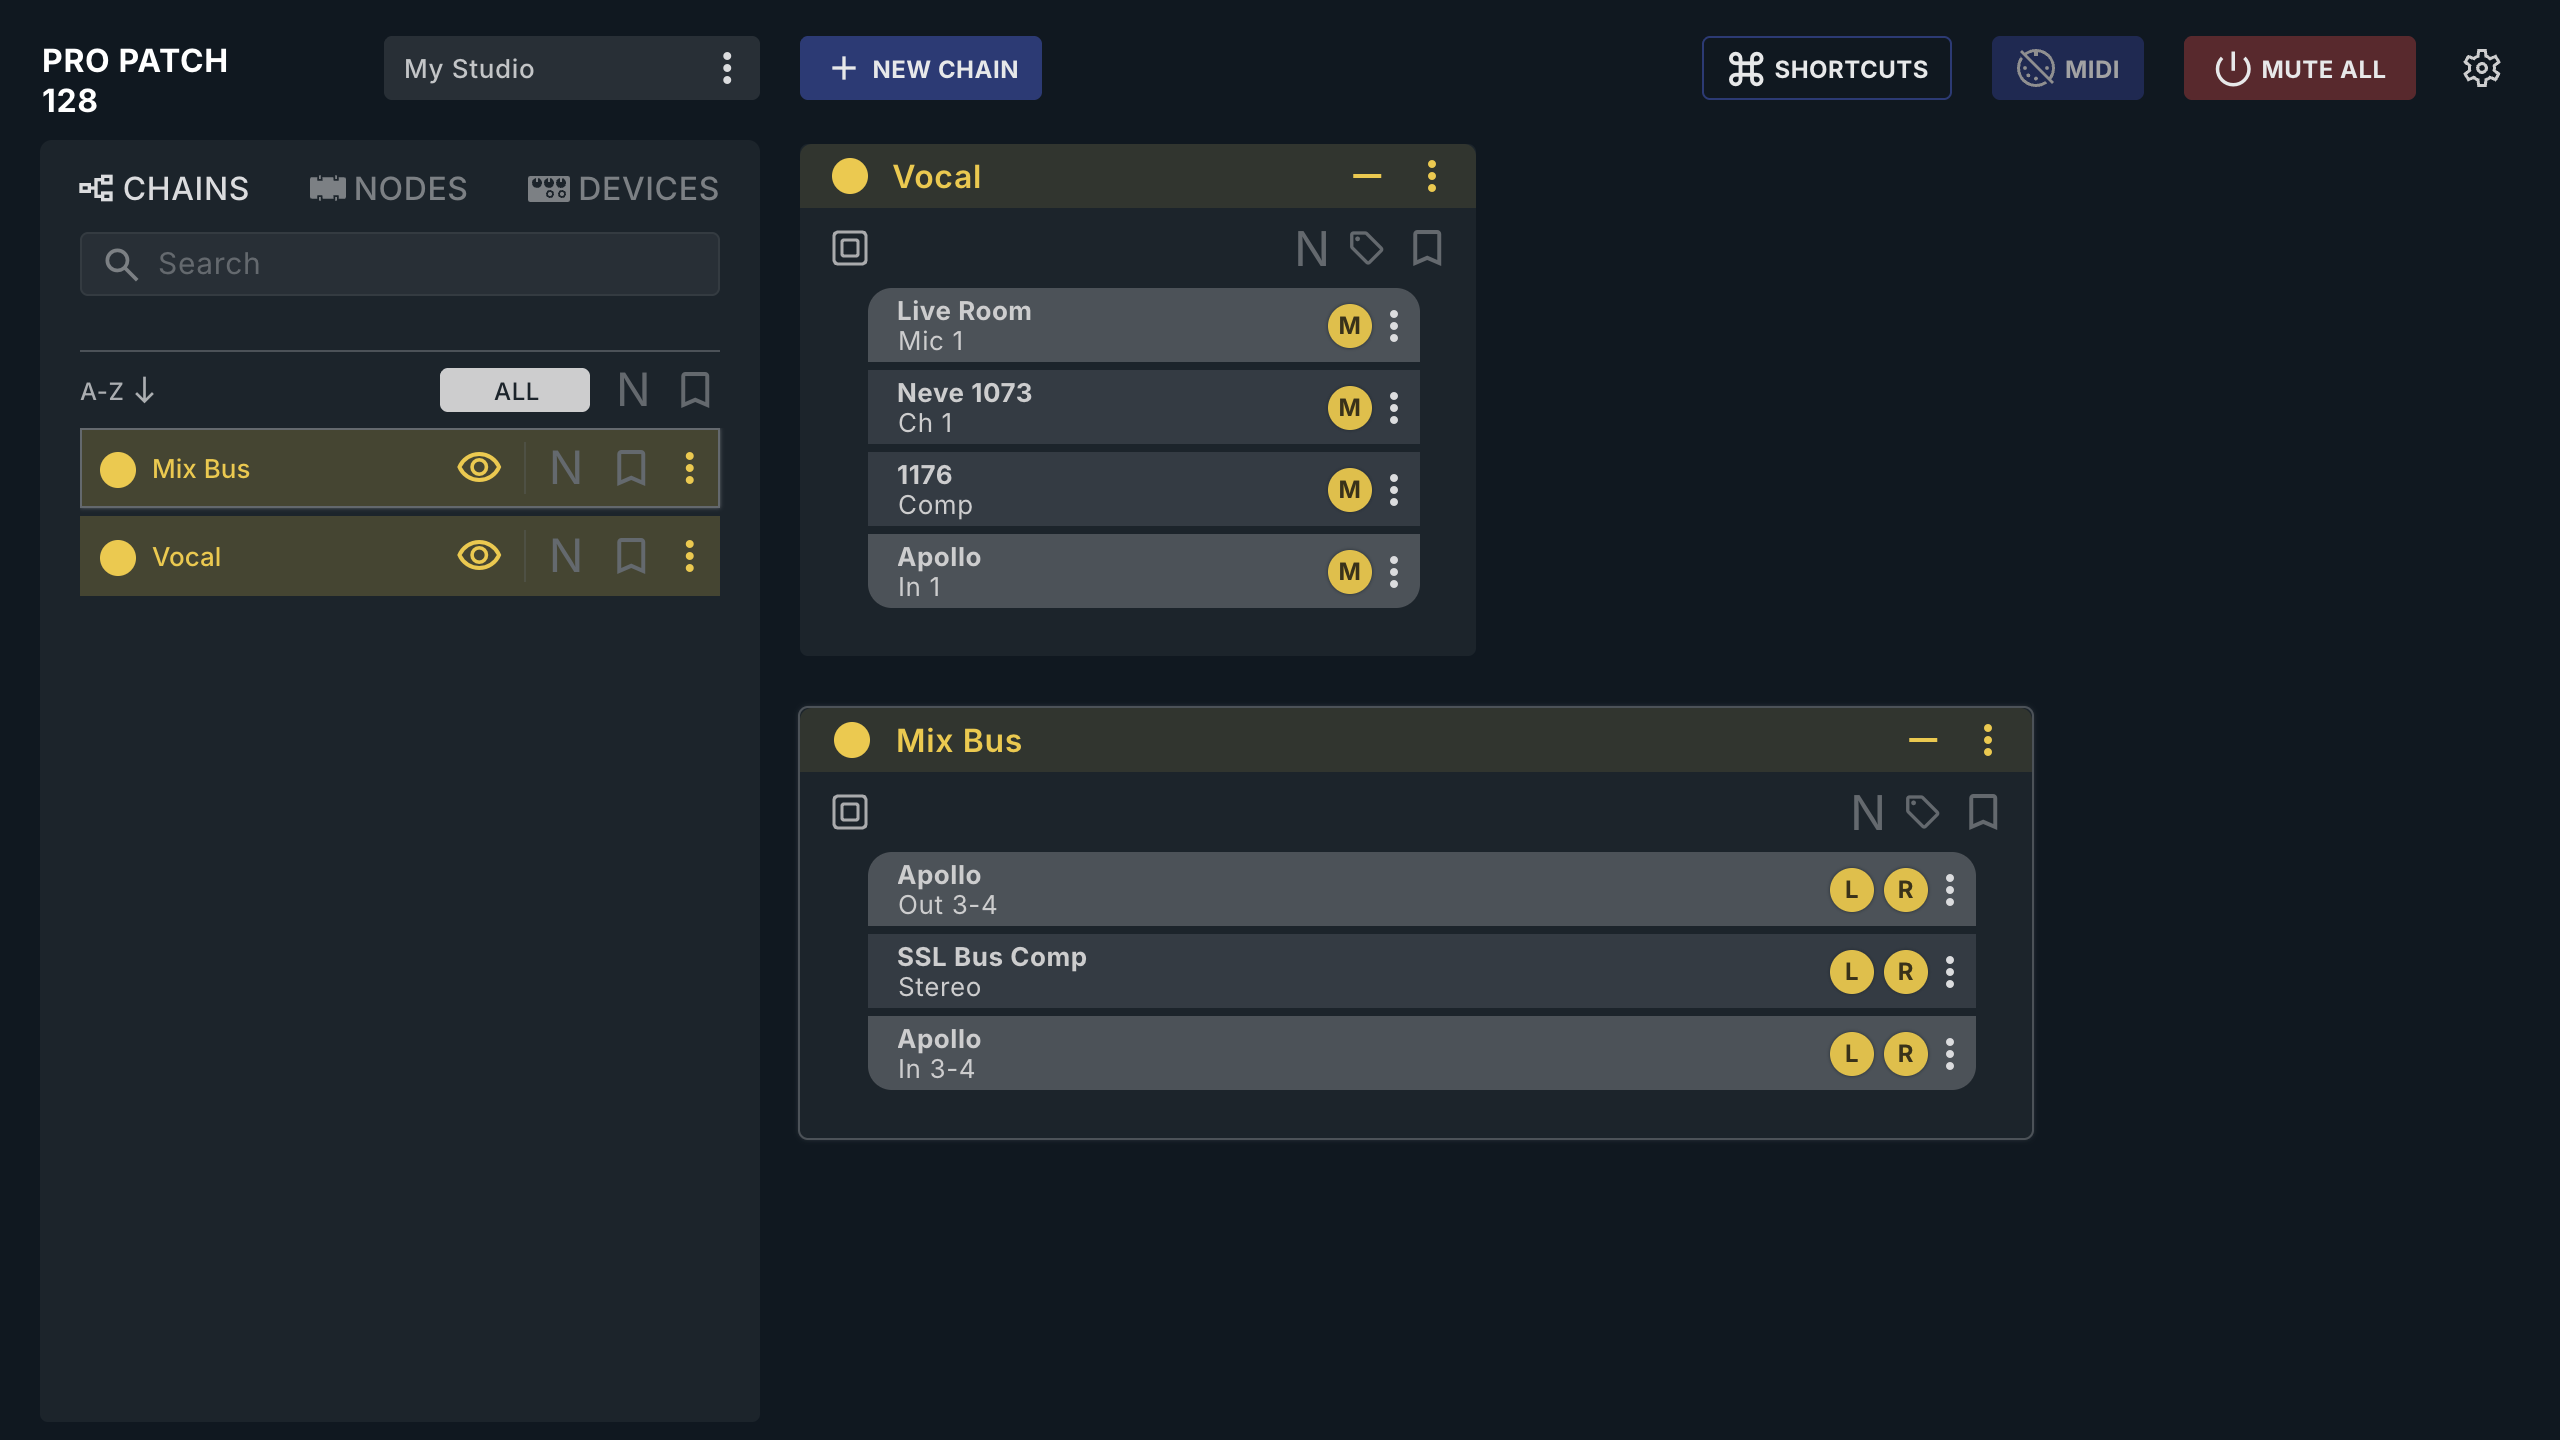
The ProPatch app showing two Chains, Vocal and Mix Bus
Wolffhound ProPatch app
The hardware · rear

Every connection has a name.

IN FROM DEVICE · Device outputs ProPatch 128 rear panel: six DB25 Port pairs A to F, Control and Dante Ethernet jacks, two USB-C ports OUT TO DEVICE · Device inputs Control · USB-C A/B

Port ID = Port letter + channel

CPort (a DB25)
+
3channel (1–8)
=
C3Port ID

Each rear DB25 is a Port of eight channels. The top row, IN FROM DEVICE, takes signal from a Device. The bottom row, OUT TO DEVICE, sends signal to one.

ModelInputs × outputsRear Ports
ProPatch 3216 × 16A–B
ProPatch 6432 × 32A–D
ProPatch 12864 × 64A–F
ProPatch 200100 × 100A–L

The model number counts every patch point: a 128 is 64 in × 64 out.

The hardware · front

Sixteen patch points up front.

TT outputs · FP1–FP16 ¼″ TRS outputs · 13–16 ProPatch 128R front panel: two rows of TT jacks, four XLR combo inputs, four quarter-inch TRS outputs, and the power button TT inputs · FP1–FP16 XLR combo inputs · 13–16

Normals on channels 13–16

XLR in→TT in 13–16
TT out 13–16→TRS out

The four XLR combo jacks feed TT inputs 13–16. The four ¼″ TRS jacks carry TT outputs 13–16. A TT plug in 13–16 breaks the normal and takes over that channel. The XLRs are inputs only, and the TRS jacks are outputs only.

The panel legend reads P1–P16. In the ProPatch app these are FP1–FP16.

Extra channels, or shared with the rear?

ModelFront channels
ProPatch 32All 16 share a path with A1–B8
ProPatch 64All 16 share a path with C1–D8
ProPatch 128All 16 are extra: their own channels
ProPatch 200FP1–FP12 share with K5–L8; FP13–FP16 are extra

A shared pair is one path with two jacks, so only one of the two can be active at a time. The ProPatch app flags the conflict.
Get connected

Power up and find the unit.

STEP 1

Plug in the included supply

Either rear USB-C port, A or B. Turn the unit on.

Use only the included supply. A lookalike can light the unit but not switch the relays.
STEP 2
steady green

Wait for steady green

A short startup flash is normal. Red means a power problem: check the supply before going further.

STEP 3

Ethernet to Control

Not the Dante jack: it doesn't connect the unit to Wolffhound. USB works too.

STEP 4
128Studio A

Open Wolffhound, click the tab

The ProPatch appears as a tab. Click it to open the ProPatch app.

Prove it works: open the Session selector (top left), choose Demo, then click the round button left of a Chain's name to switch it off and on. The relays click. Turn the monitors down first: this switches real relays.

How it thinks

Four words explain it all.

1 · DESCRIBE
Device

A piece of equipment plugged into ProPatch.

e.g.Neve 1073 · 1176 · Apollo · live-room tie lines
2 · DESCRIBE
Node

One signal path through a Device, and the Port IDs it's cabled to.

e.g.Neve 1073 › Ch 1 · out C1 in C1
3 · ROUTE
Chain

Nodes connected in order: a Source, any Processors, a Destination.

e.g.Mic 1 → Neve Ch 1 → 1176 → Apollo In 1
4 · RECALL
Session

All of it saved together: Devices, Nodes, and which Chains are on.

e.g.Tracking · Mixing · Client A

Describe each Device once. Route it forever.

Nodes

Every Node is one of three kinds.

The kind depends on which way the signal flows, not on what the Device is.

Source

Signal comes into ProPatch and starts a Chain.

Tie lines from the live room, an interface's outputs, a synth.

Processor

Signal goes out to the Device and comes back.

Compressors, EQs, mic pres, effects.

Destination

Signal leaves ProPatch and ends the Chain.

An interface's inputs, a recorder, a monitor controller.

AlsoEach kind comes in Mono or Stereo, plus Mono to Stereo Processor for a box like a reverb: one send, two returns.

Examples

Real equipment, as Devices and Nodes.

In the ProPatch app

Add a Device in three moves.

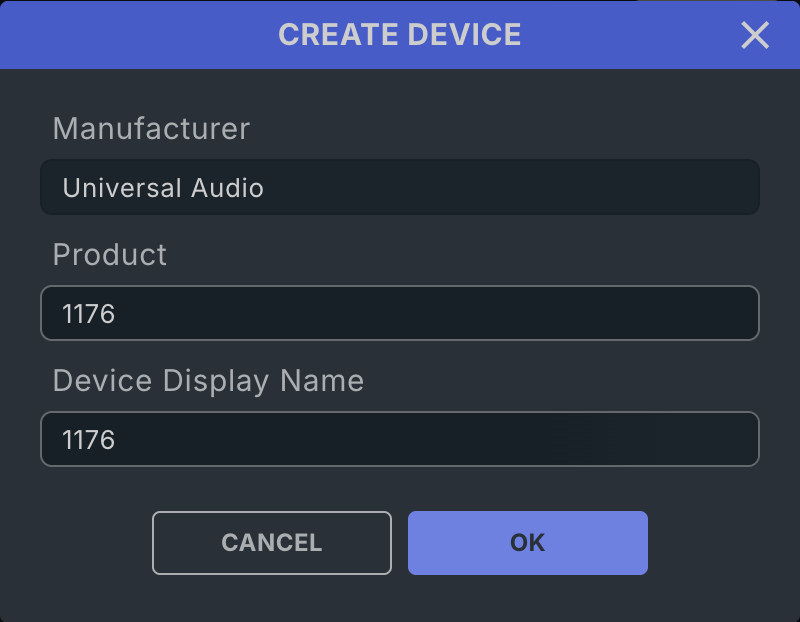
The CREATE DEVICE dialog filled in for a Universal Audio 1176

1Create the Device

Open DEVICES in the browser on the left and click + NEW DEVICE. Name it and click OK.
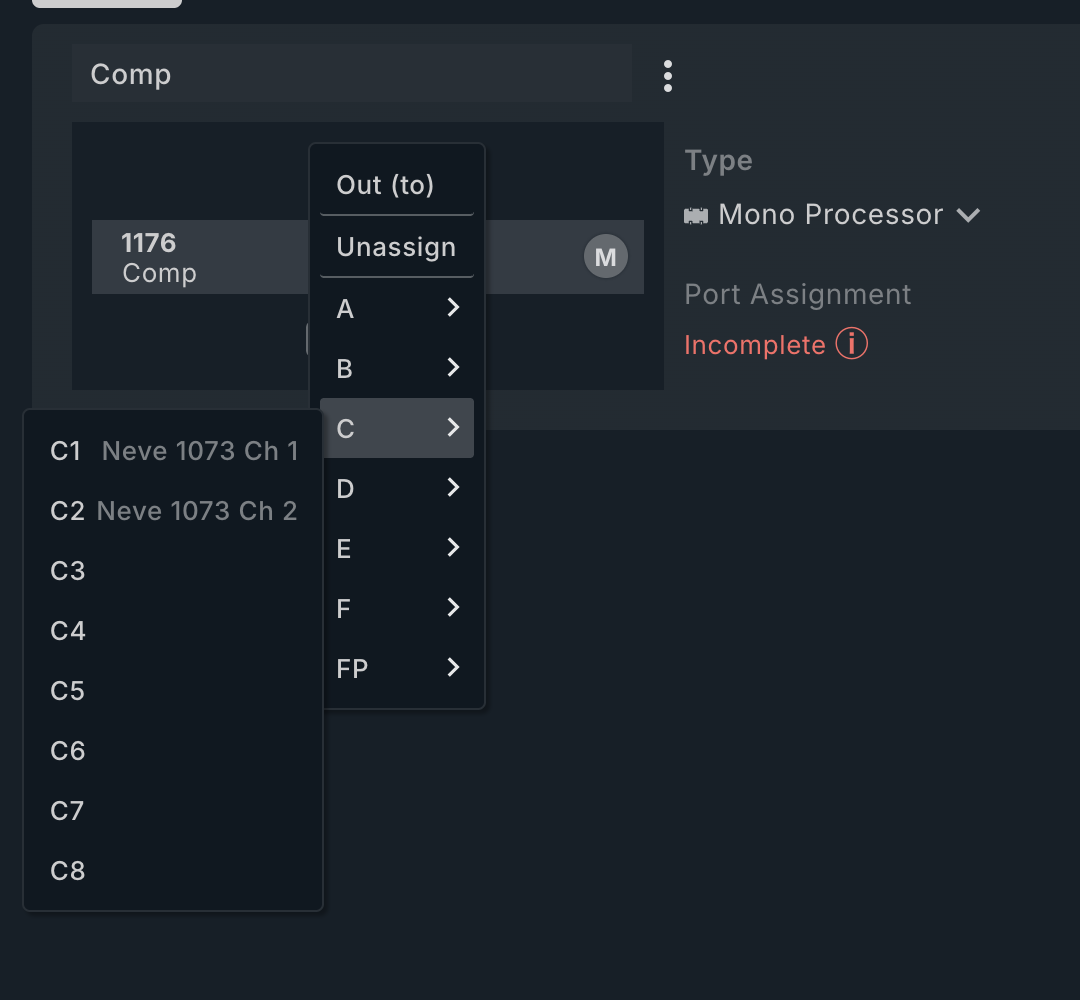
The port menu open on the 1176's Out (to) box, with Port C expanded to show channels C1 to C8

2Set the Node's Type and ports

Every new Device starts with one Node. Choose its Type, then click each port box and pick the Port ID it's cabled to. The menu shows which channels are already in use.
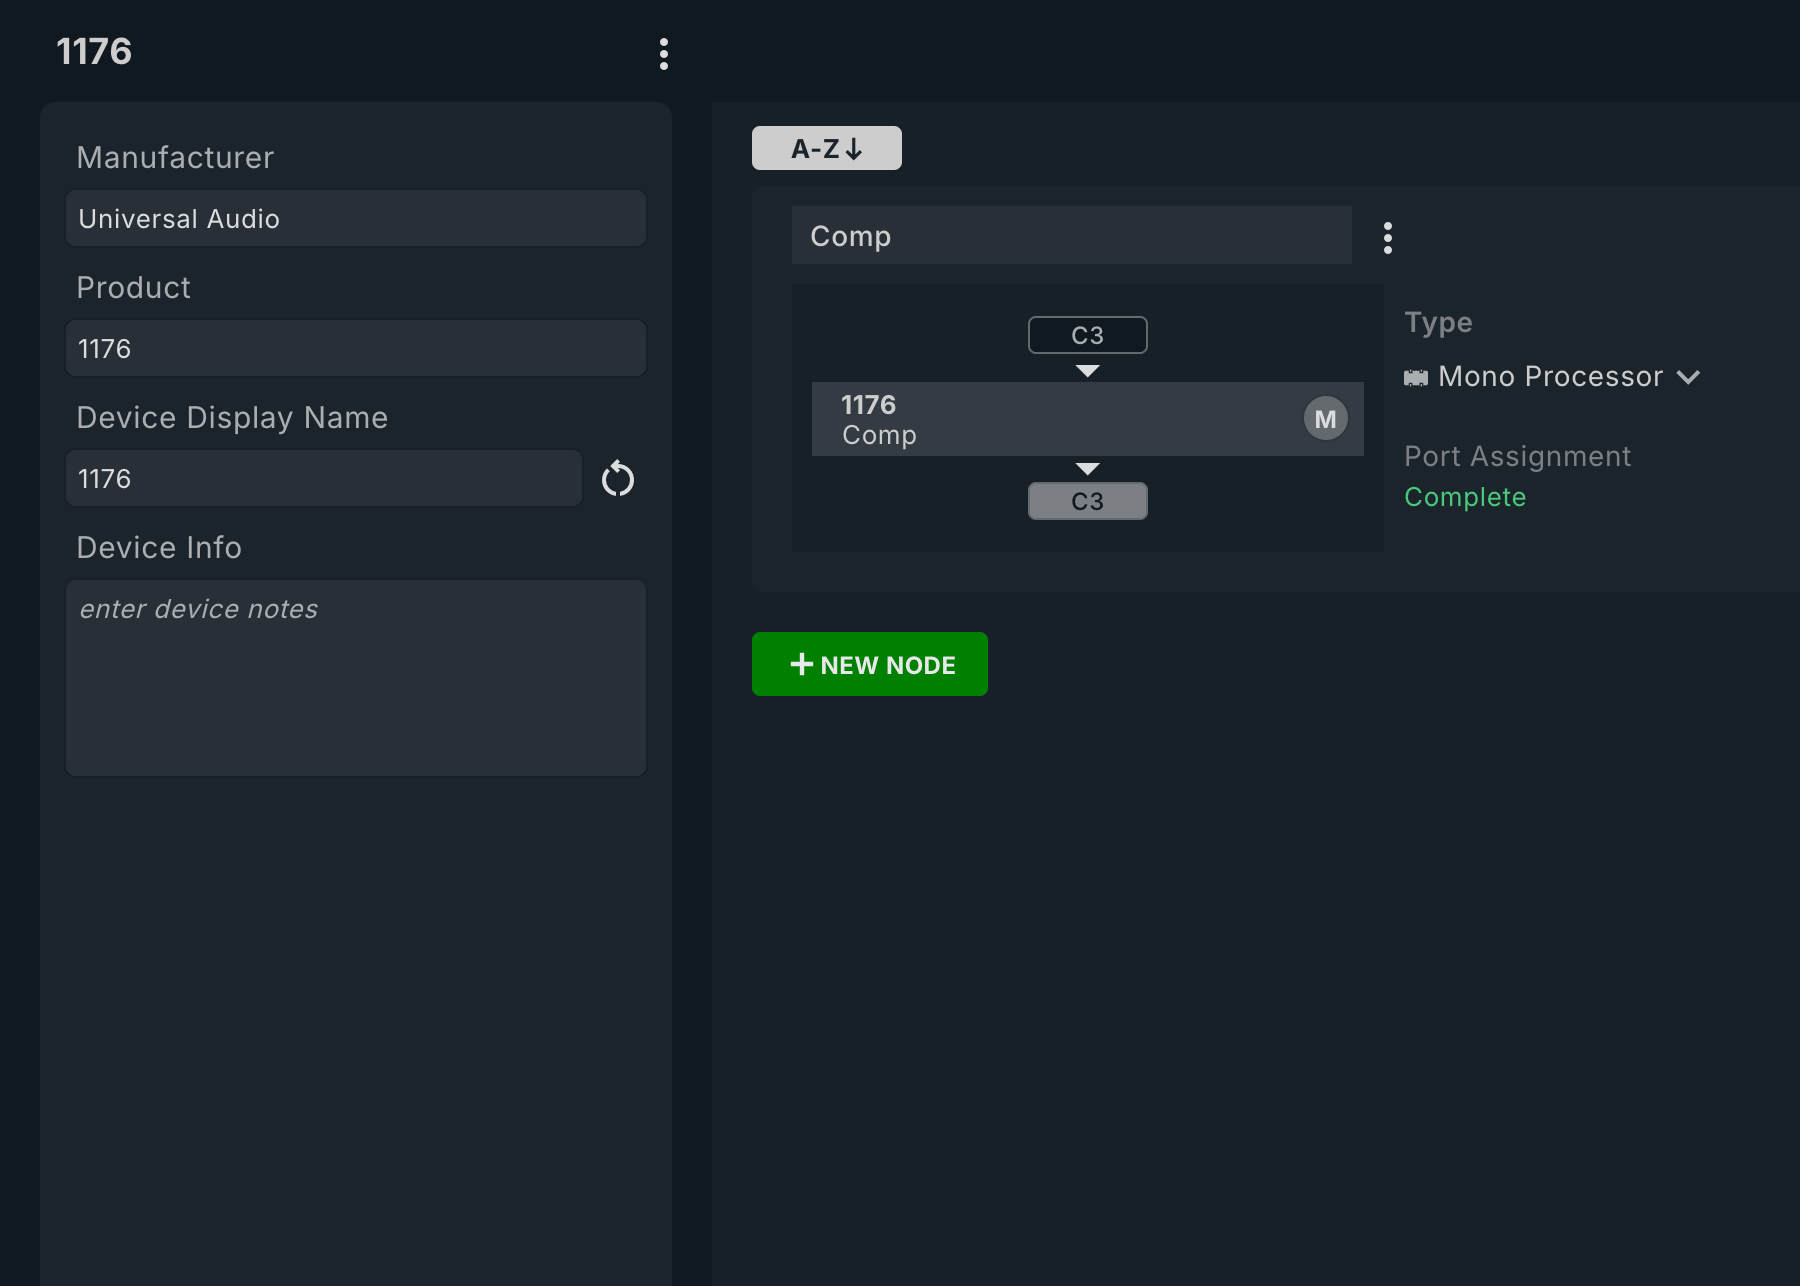
The finished 1176 Device: one Mono Processor Node, Out (to) C3 and In (from) C3, Port Assignment Complete

3Look for Complete

When every port is set, Port Assignment reads Complete and the Node is ready for a Chain. More channels? Click + NEW NODE.
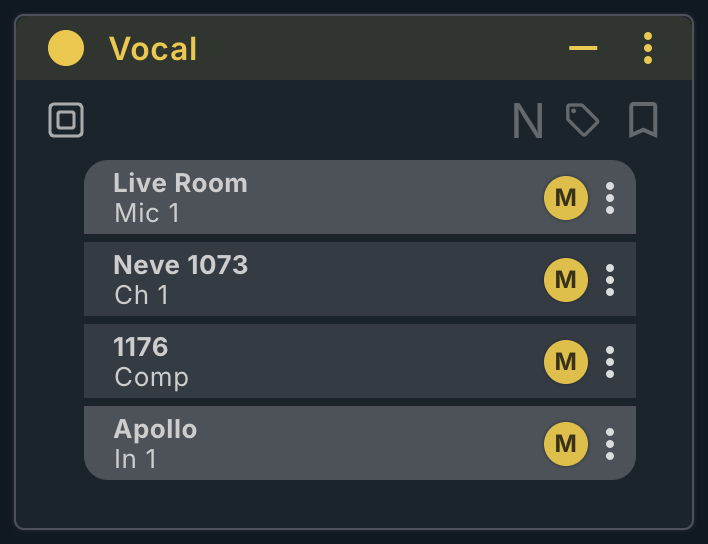
Chains

Connect Nodes into a Chain.

Vocal Off. Click the circle to switch it on.
Source
Live RoomMic 1
M
IN B1
Processor
Neve 1073Ch 1
M
OUT C1→IN C1
Processor
1176Comp
M
OUT C3→IN C3
Destination
ApolloIn 1
M
OUT A1
  1. Open NODES and click + NEW CHAIN. Type a name and press Enter.
  2. On SOURCES, PROCESSORS, then DESTINATIONS, double-click a Node (or drag it) to add it in signal order.
  3. Once the Chain has a Source and a Destination, it switches on by itself: the circle fills and signal flows.
The Vocal Chain in the ProPatch app: Live Room Mic 1, Neve 1073 Ch 1, 1176 Comp, Apollo In 1, all active
Sessions

Save it. Switch setups in seconds.

A Session keeps the Devices, Nodes, and Chains, and which Chains are on. Keep one for tracking, one for mixing, one per client.

  • Start a new one: the Demo Session is read-only, so open the Session selector and choose New Session.
  • Keep the work: Session selector › Save.
  • Stop everything: MUTE ALL, top right.
  • Undo a mistake: ⌘ Z.
The My Studio Session with two active Chains: Vocal (mono) and Mix Bus (stereo, through the SSL Bus Comp)
Ready to go

That's ProPatch.

  • Wolffhound finds the unit; its tab opens the ProPatch app.
  • Included supply, steady green, Ethernet to Control.
  • A Device is a box. A Node is one path through it, with Port IDs.
  • Nodes are Sources, Processors, or Destinations.
  • A Chain links Nodes in order, and ProPatch makes the connection.
  • A Session saves the lot.

Tip: start with one Source and one Destination, get audio through, then add Devices a few at a time.